
Pre-Season Spring Checklist
The harvest window is narrow. A spring that breaks in the field costs half a day; a half-hour check before the season starts usually prevents that stop altogether. This checklist goes group by group through what to look at and how to decide.
2026-09-123 min readMetiş Yay
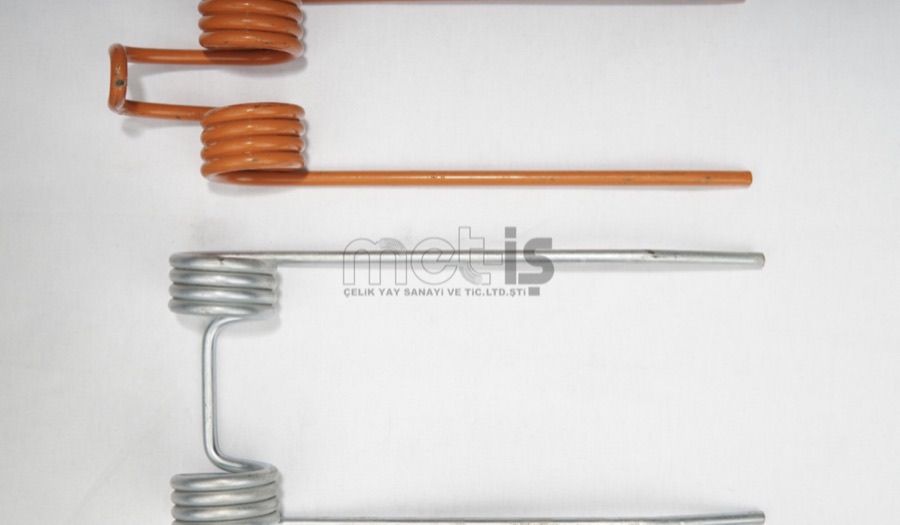
Before you start: three criteria
What you are looking for is not a break. A broken spring announces itself. You are looking for the three signs that come before it: loss of free length, opening of the leg angle, and wear at the tip.
All three are the same thing seen on different spring types — the material reaching its fatigue limit. If one is present, the spring is still intact but no longer doing its job as it did.
Baler
- Pickup tine springsScan the leg angles along the row by eye. Mark the ones that have clearly opened and check their neighbours too — they have fatigued at the same rate.
- Pad pressure groupCompare the free lengths of the springs against each other. Where they differ, the shorter one has fatigued. If bale density has dropped, this is the first place to look.
- Knotter and needle groupThe section that makes a full stroke on every bale. A break here stops the machine completely; look for cracks and permanent set.
- Shear key and latch springsSmall parts, but a missing one leaves the mechanism unprotected. Count them.
- Rake barTines with a distorted or bent leg form make the windrow uneven.
Hay rakes and tines
- Leg angleThe single most important indicator in this group. If the spring does not return to its original angle unloaded, replace it.
- Tine tipThinning is lost cross-section, and breakage starts there. Feel it by hand.
- Coil directionSprings replaced last season may have been fitted the wrong way round. A reversed spring opens at the body and loosens on the shaft.
- On gearbox-driven (rotary) rakesThe arms turn continuously, so the tines see far more cycles than on a trailed rake. Check this group more often.
Seed drills
- Coulter pressure springCompare the free length against the original. When force drops the opener rides up on hard ground and sowing depth varies across the field.
- Press wheel springWhen force drops, closing becomes uneven and seed is left exposed in places. Uneven emergence is often blamed on the drill setting when the cause is here.
- CorrosionThis group is in constant contact with soil and moisture. Rust removes cross-section and lowers spring force; look for pitting on the surface.
Combines, forage harvesters and mowers
- Combine pickup springsThe group with the narrowest harvest window. If the body has taken a permanent set, replace without waiting for a break.
- Forage harvester ball springsOn hooked extension springs, inspect the root of the hook — most failures happen there rather than in the body.
- On independent-row unitsA difference in spring force changes cutting height from row to row. Compare free lengths.
- Mower drum suspension springIf the drum has started touching the ground the suspension spring has fatigued, and blade wear accelerates too.
Planning spares
Keeping spares for the items you find suspect is always cheaper than standing still mid-harvest. It is common practice in the combine pickup group and on the baler knotter.
Choose the pack size against the number of springs on the machine: replacing a whole row gives a more even result than replacing one at a time, and saves a second trip to the field.
What to do at the end of the season
Clean the springs before the machine is put away. Soil and crop residue left on them holds moisture, and corrosion starts at those points over winter.
Note the broken and clearly opened springs at the end of the season and order over winter. Waiting for a part everyone is looking for at the same time is the most easily avoided delay there is.
Frequently asked questions
When should I do the check?
Before the season starts, while the machine is still in the yard. Because the harvest window is narrow, a check done in the field is always too late.
Should I replace a spring that has not broken?
If the free length has shortened, the leg angle has opened or the tip has worn, yes. The spring may look sound but it is no longer giving its original force.
One spring broke — should I replace only that one?
Springs in the same group see similar loads over a similar number of cycles and fatigue together. If one has broken its neighbours are close behind, so replacing the row gives a more even result.
Do I need special tools for the check?
No. Leg angle and tip wear can be judged by eye and hand. A rule is enough to compare free lengths, and a caliper if you need to measure wire diameter.
Related pages
Cannot find the spring you need?
We produce to your dimensions in the 0.20–40 mm wire range, with no tooling dependency. A sample, a technical drawing, or simply a photograph of the old spring is enough.
Fill in the quote formOr call us directly: 0850 840 54 17